Layout your paper bags by alternating the flaps. Lay down the first bag with the opening on the left and the flap on the right, then with the second bag on top of the first have the flap on the left and the opening on the right and so on. This will help even out your album so the thicknesses of the flaps are not all on one side. (Some people spray the bags with a mist that will make them archival quality/acid free. I don't. I do cover the bags though with scrapbooking paper and figure these books are for the kids to cart around if they want to. I'm not going to go all "scrap crazy" on them.)
After you have your bags organized then fold them together like a book and bind them somehow. You can either staple the middle to hold them together or punch holes in folds and use ribbons or eyelets to hold the pages. Another option is to sew the bags down the middle to create a binding for your album.
Once you have bound the book then you are ready to start decorating your pages. Cut the scrapbook papers to the appropriate sizes to cover the pages. You will want a base cover for the pages, then cut photo mats and add embellishments.
(I found the above instructions at http://www.ehow.com/how_2118781_paper-bag-album.html )
 |
| Embellishments on the cover that I used were some bubble stickers, ribbon on the right of the picture, and the paper ribbon to bind the pages together. |
 |
Since you use paper bags, you get natural pockets from the top of the bag being used as a page.One of the album pockets that occurs - you could store extra pictures or mementos in here. |
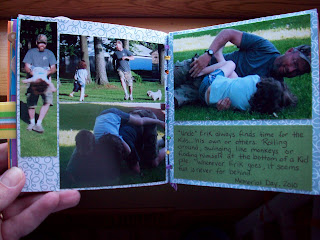
Here are some layouts from the album:

 |
Some embellishments on these layouts were some pop up monkey stickers I found at Wal-Mart and bright ribbon to go with the colors used throughout the album. |
After tying, I opened up the ribbon to make it a little more fun.


No comments:
Post a Comment